A subject I’m constantly asked about when I’m taking photos is how to get the best light for a given shot. Now, there are tons and tons of nifty little tricks and tips about this sort of thing, but as far as I’m concerned, nothing beats the look and feel of photograph that’s shot using natural light.
The problem is, not every environment is naturally well lit.
So, since this can be incredibly frustrating subject for tons of beginners and professionals alike, here are some excellent natural light photography tricks.
I. Plan ahead and get the timing right.
This might sound like a simple part of the process but DO NOT (I REPEAT, DO NOT) underestimate the importance of scouting a location beforehand or have the mindset that beautiful pictures can be taken at any and all times. Whether you’re shooting indoors or outdoors, different times of the day will produce better images than others. Period. You have to find out which times work for your and your equipment.
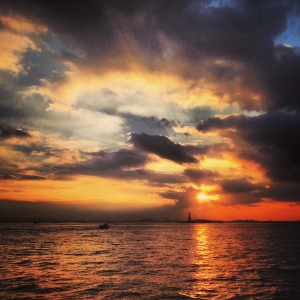
For example, if you’re unfamiliar, the “Golden Hour” is referred to by many photographers as one of the most ideal time to take natural light photos outdoors. Why? Ever notice how everything gets a yellowish orange tint as the sun is going down or just comping up? The Golden Hour makes for vivid, bright light in photos that is excellent for lighting a subject or background and usually happens in the first hour after sunrise or the first hour before sunset.
The one downside is that since it can often be incredibly bright, it might also make for an uncomfortable sitting for your human subjects (as they squint into the sunset). One solution to this sun-burnt-eyes fiasco is to backlight your subject, placing the sunset behind them, and light the foreground using a flash. It may seem counter-intuitive to use a flash when it’s bright out, but it makes an incredible difference in lighting the subject’s face and utilizing every bit of the natural light around you. What you will *hopefully* end up with, is creating something of a glowy halo effect around the outline of your subject.
The bottom line here is quite simple: plan ahead and know what you’re getting into, whether you’re shooting indoors or outdoors. Plan to work with the light and shadows and know how those angles will change at different times of the day.
II. Use what you’ve got.
If you’ve ever looked at a professional photographer’s gear bag, it seems as though they have some piece of equipment for every occasion (and they probably do). BUT, you don’t need every tool or gadget in creation to make your own gorgeous natural light photos. What you will need is to be creative.
Since natural light at different times of the day can produce harsh shadows (like a bright midday sun will cast shadows under a person’s eyes and chin), one handy trick is to reflect light up into those shadows using a light reflector, otherwise known as a bounce board or board reflector.
In case you don’t know what those are, have you ever seen people using those reflectors to sun themselves at the pool? It’s kind of like that. The whole idea is just to naturally light otherwise shadowed areas.
Now, you can easily go on Amazon and find a light reflector for anywhere between $10 and $30, but you can also use a piece of cardboard wrapped in aluminum foil or a white poster board. Either of those are just as effective at getting the job done.
So the bottom line? Battle shadows with light reflectors or whatever else you have laying around. Give it a try.
III. Overcast days are your friend.
Does this sound shocking to you? It shouldn’t. Why? Because overcast days essentially diffuse light from the sun and make it incredible easy to take really great pictures throughout the day, at almost any time.
Overcast days can also create some great background effects in your photos without blowing them out with brightness or backlighting them so much that the subject is lost in silhouette. Instead, overcast days can create a highly desirable hazy look that you otherwise wouldn’t get on a bright clear day.
If you’ve never taken photos on an overcast day, I highly recommend giving it a try.
I hope these natural light photography tricks and if not, feel free to leave me a comment and let me know what specific questions you’d like answered or what you’d like to see!
Happy lighting!
-ML